Configuring Veritas NetBackup for PostgreSQL
Suggest editsImplementing Veritas NetBackup solution for backup/restore of PostgreSQL databases requires the following components:
- EDB Postgres Advanced Server.
- Veritas NetBackup Server.
- Veritas NetBackup Client.
- Veritas NetBackup Agent for PostgreSQL.
Prerequisites
- A running EDB Postgres Advanced Server.
- A running Veritas NetBackup Server.
- Veritas NetBackup Client installed on the EDB Postgres Advanced Server host.
- Veritas NetBackup PostgreSQL Agent installed on the EDB Postgres Advanced Server host.
Configuring Veritas NetBackup for PostgreSQL consists of configuring the following components:
- Veritas NetBackup Agent for PostgreSQL.
- PostgreSQL server.
The steps below show an example of how to configure Veritas NetBackup for PostgreSQL for EDB Postgres Advanced Server.
Configuring Veritas NetBackup for PostgreSQL
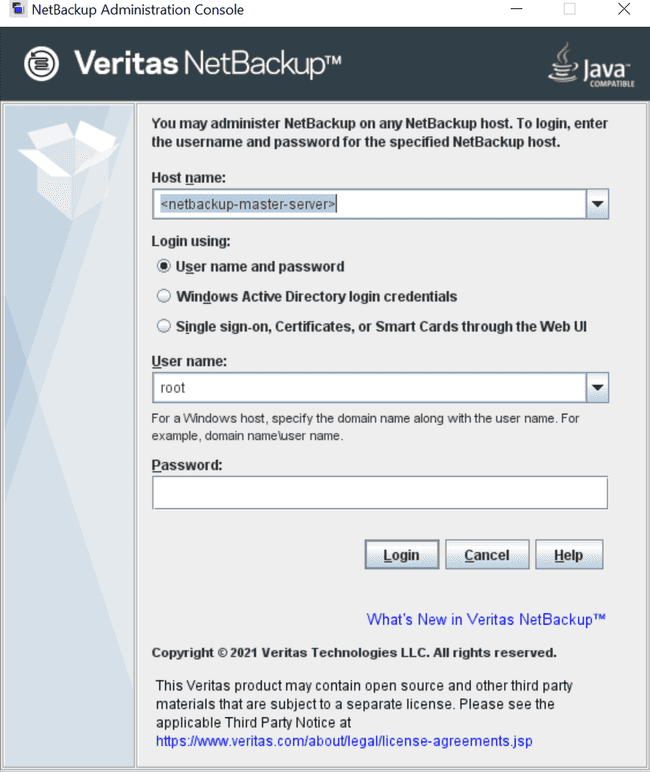
Log on to the NetBackup Administration Console:
a. Use the credentials for the root user
b. Select the hostname for the NetBackup Master Server you want to administer
Create a policy for EDB Postgres Advanced Server:
Note
Refer to the Veritas NetBackup Administrator's Guide for detailed information on policies.
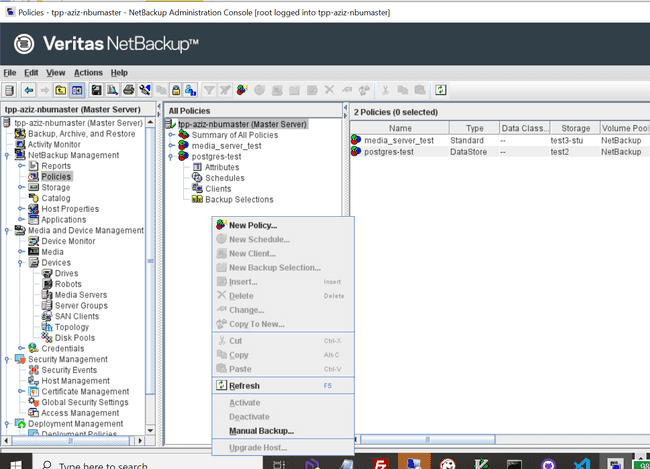
a. Click on NetBackup Management > Policies, select the NetBackup server
b. Right mouse click and select New Policy
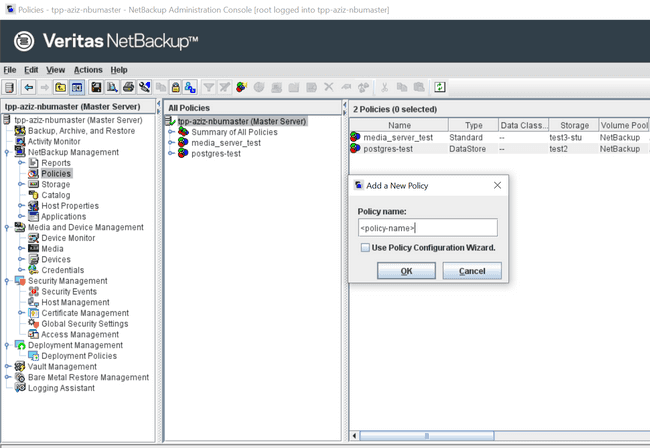
c. Enter the policy name in the Add New Policy dialog box and click OK
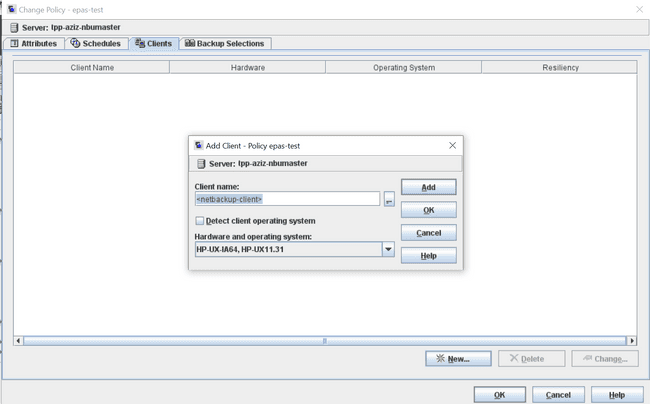
d. Select the Clients tab
e. Click on New
f. Enter the NetBackup client name in the Add Client dialog box, and click OK
g. Select the Attributes tab
h. Select DataStore for Policy type
i. Select Policy storage from available values
j. Set any other parameters you require for your policy and then click OK
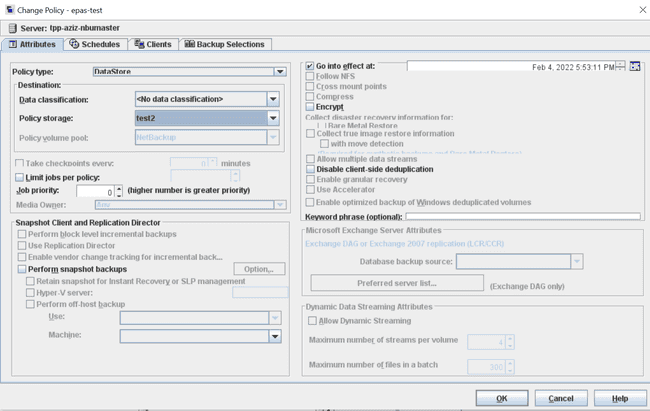
- On the NetBackup Client, update the agent configuration file
/usr/NBPostgreSQLAgent/nbpgsql.confto set the necessary parameters to make the agent work successfully with EDB Postgres Advanced Server:DB_USER= enterprisedb DB_PORT=5444 DB_INSTANCE_NAME=edb PGSQL_LIB_INSTALL_PATH= /usr/edb/as13/lib MASTER_SERVER_NAME=<netbackup-master-server> POLICY_NAME=<datastore-policy> SCHEDULE_NAME= Default-Application-Backup SNAPSHOT_SIZE=4MB
Note
Value of PGSQL_LIB_INSTALL_PATH will be dependent on the version of EDB Postgres Advanced Server installed. Values of MASTER_SERVER_NAME and POLICY_NAME parameters must match the names of your NetBackup Master Server and DataStore Policy respectively.
In the sample configuration file above, the values for DB_USER, DB_PORT, DB_INSTANCE_NAME, and PGSQL_LIB_INSTALL_PATH have been substituted for EDB Postgres Advanced Server as the default values are for Postgres. Refer to the Veritas NetBackup for PostgreSQL Administrator's Guide for detailed description of the parameters.
Configuring EDB Postgres Advanced Server
Set up WAL archiving on the EDB Postgres Advanced Server server by using the steps below. WAL archiving prepares Postgresql/EDB Postgres Advanced Server database servers for backup/recovery operations and is a precondition for any backup/recovery tool to work with the database server.
Create a writeable
<archivedir>directory at your desired location.Set the required parameters in the
postgresql.conffile to turn on WAL archiving:wal_level = archive archive_mode = on archive_timeout = 0 statement_timeout = 0 archive_command = test ! -f <archivedir>/%f && cp %p <archivedir>/%f
Note
Replace <archivedir> in the archive_command parameter with the location of the directory created in Step 1.
- Restart the PostgreSQL server.
Refer to the Veritas NetBackup for PostgreSQL Administrator's Guide for detailed information on how to configure EDB Postgres Advanced Server for Veritas NetBackup Agent for PostgreSQL.
Could this page be better? Report a problem or suggest an addition!